Best Practices
Start with Simple Requirements
Even the best models currently available still struggle with handling multiple tasks simultaneously and often mix up their processes or results.
Therefore, starting with simple requirements and adding one new requirement or fixing one bug per new version can greatly enhance the quality of the generated plugin. This is especially true in Speed Mode.
Basic Plugins
You only need to clearly describe the functionality of the Plugin, and BudCoder can complete the development of a simple plugin.
A simple plugin refers to one that can be implemented using WordPress built-in Hooks and PHP built-in functions, with an overall length of 300 to 500 lines of code.
Let's take "Add view count for articles" as an example to demonstrate how to operate.
Enter Add view count for articles in the text box on the homepage, then click Start.

After a short wait, an optimized requirement description will appear in the text box:
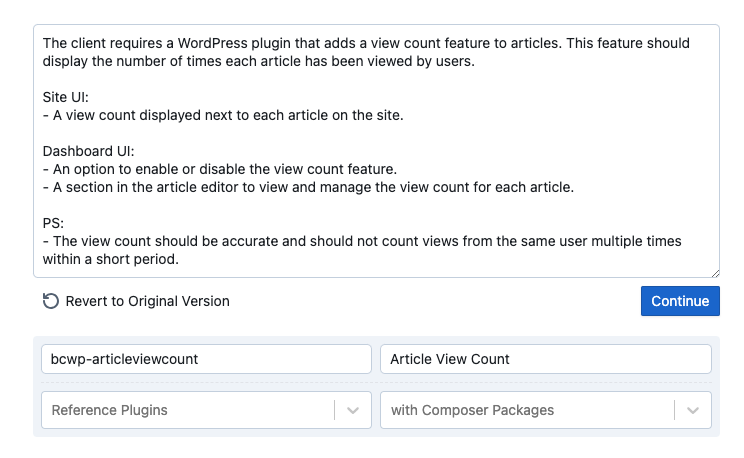
The client requires a WordPress plugin that adds a view count feature to articles. This feature should display the number of times each article has been viewed by users.

Site UI:
- A view count displayed next to each article on the site.

Dashboard UI:
- An option to enable or disable the view count feature.
- A section in the article editor to view and manage the view count for each article.

PS:
- The view count should be accurate and should not count views from the same user multiple times within a short period.
As you can see, the requirements have been refined, specifying adjustments to be made in both the Site UI and the Dashboard UI.
Since the initial requirement description was too simple, the optimized requirements here may not always meet the user's actual needs. For example, here, our original intention was to add a column in the Dashboard's article list to display the view count of articles, without making the view count public. We can modify the requirements as follows:
The client requires a WordPress plugin that adds a view count feature to articles. This feature should display the number of times each article has been viewed by users.

Site UI:
-

Dashboard UI:
- Add a column to the Posts list in the Dashboard to show view counts.

PS:
- The view count should be accurate and should not count views from the same user multiple times within a short period.
Click Continue to start generating the plugin.
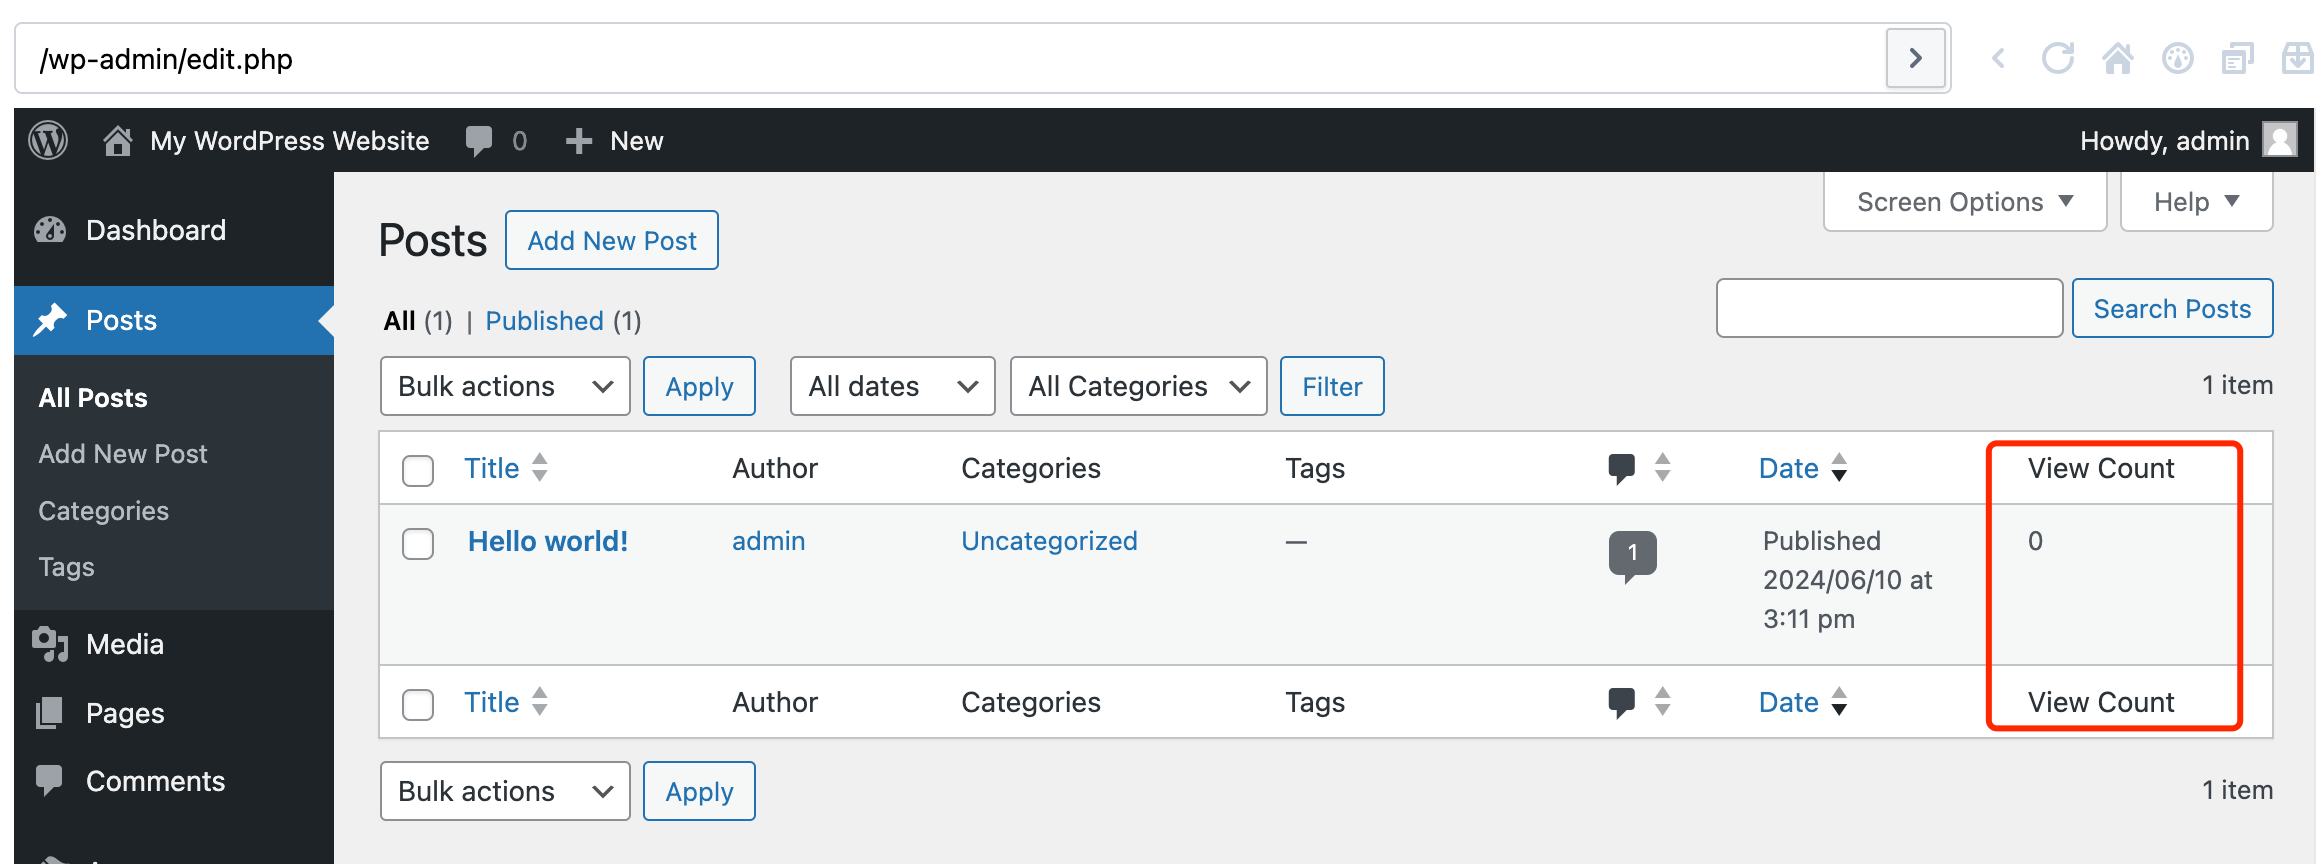
You can click here to test the generated plugin.
With Composer Packages
For more complex tasks that cannot be accomplished with built-in hooks alone, we can use Composer Packages.
Here, we explain using the example of "calling the OpenAI API to generate a slug based on the article title."
The logic of the plugin itself is relatively simple, only requiring the addition of a button in the article editor interface, which calls the OpenAI API when clicked. The main issue is our lack of knowledge on how to operate the OpenAI API.
Visit Composer Package List and enter OpenAI. We can see many pre-packaged packages available for use.
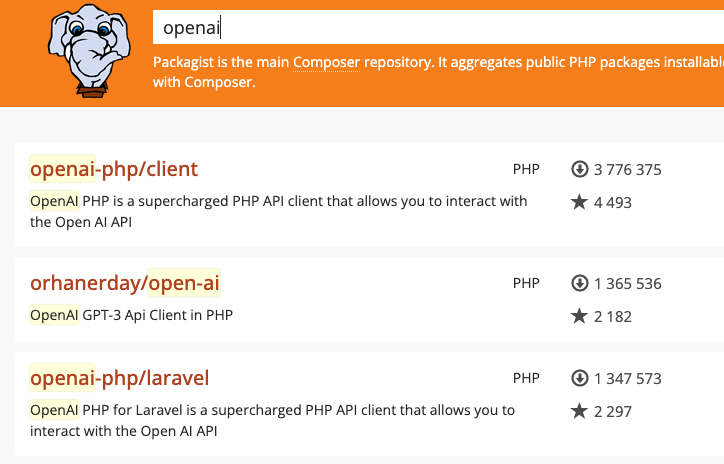
Click on the first result to see specific usage examples for this package:
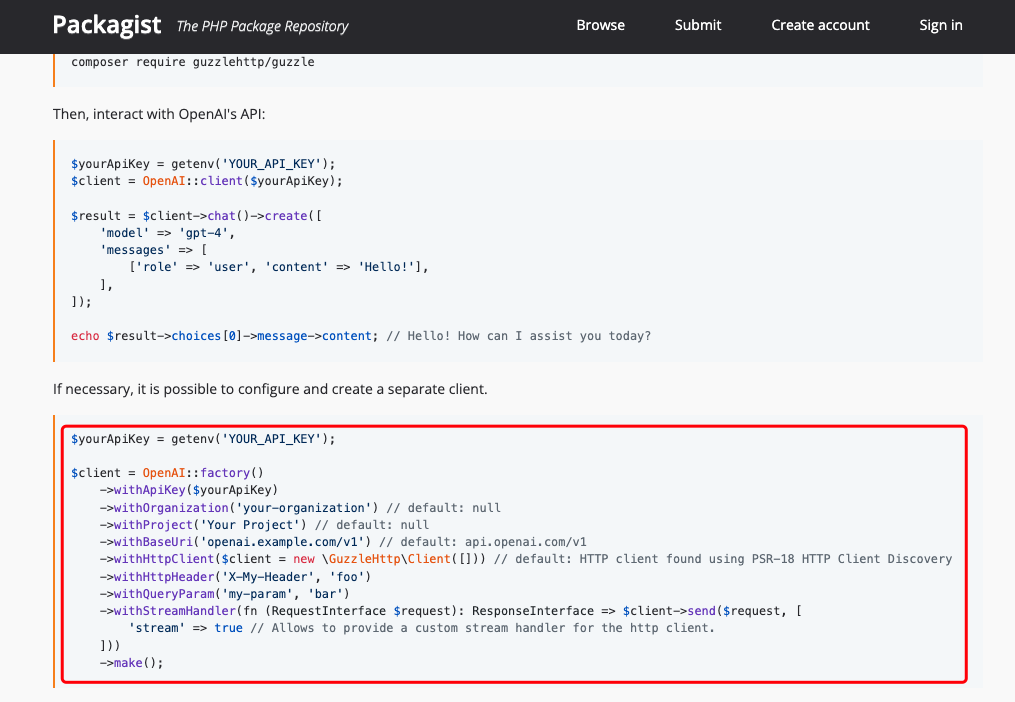
Remember the package name and examples, and we can add this information at the end of the requirement description:
The client requires a WordPress plugin that adds a button to the article editing page. When clicked, this button should automatically generate the slug of the article based on the article title. The generated slug should be displayed above the edit box using a WordPress notice div.

Site UI:
-

Dashboard UI:

The plugin should include a button on the article editing page (block editor version) that triggers the slug generation and displays the result using a WordPress notice div.

A settings page to fill in the OpenAI key, model, and API base.

PS:
Slug generated by OpenAI API, using the composer package: openai-php/client.

Demo:

$yourApiKey = getenv('YOUR_API_KEY');

$client = OpenAI::factory()
    ->withApiKey($yourApiKey)
    ->withOrganization('your-organization') // default: null
    ->withProject('Your Project') // default: null
    ->withBaseUri('openai.example.com/v1') // default: api.openai.com/v1
    ->withHttpClient($client = new \GuzzleHttp\Client([])) // default: HTTP client found using PSR-18 HTTP Client Discovery
    ->withHttpHeader('X-My-Header', 'foo')
    ->withQueryParam('my-param', 'bar')
    ->withStreamHandler(fn (RequestInterface $request): ResponseInterface => $client->send($request, [
        'stream' => true // Allows to provide a custom stream handler for the HTTP client.
    ]))
    ->make();
This can greatly improve the quality of the generated code, especially in Speed Mode.
Additionally, enter the package name in the with Composer Packages input box and select it. This way, BudCoder will automatically load this package and its dependencies during the Preview.
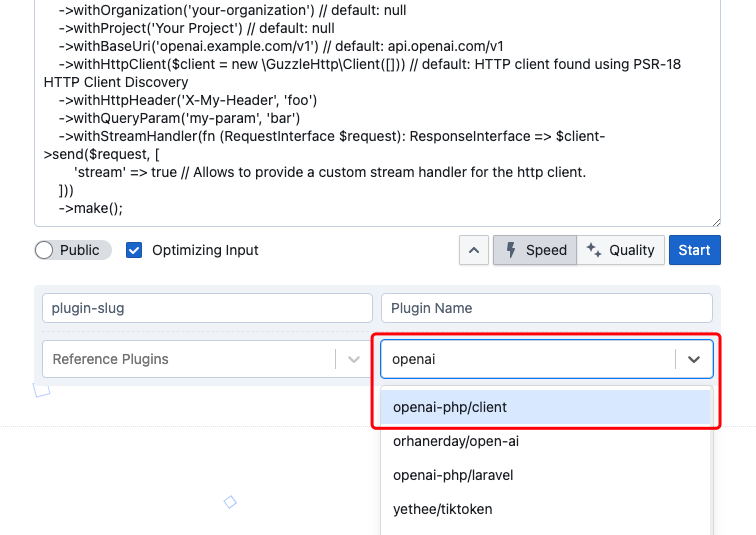
You can click here to test the generated plugin.
With NPM Packages
The latest versions of WordPress have started using the Block Editor, requiring us to use React and specific NPM packages when developing plugins related to the article editing interface.
Similar to Composer but for JavaScript. NPM (Node Package Manager) is a package manager and software repository for the JavaScript language. It is the default package manager for the Node.js platform, primarily used to manage dependencies in Node.js projects.
For these types of plugins, we recommend compiling and debugging on a local computer.
However, for some simpler scenarios, you can also instruct BudCoder to generate code that does not require packaging.
Below, we use the requirement "Create a Block Editor Widget that allows users to paste HTML as Markdown directly and display it in code format" as an example to demonstrate.
The requirement itself is relatively simple, but the complexity lies in the logic of converting HTML to Markdown. Here, we can use turndown.
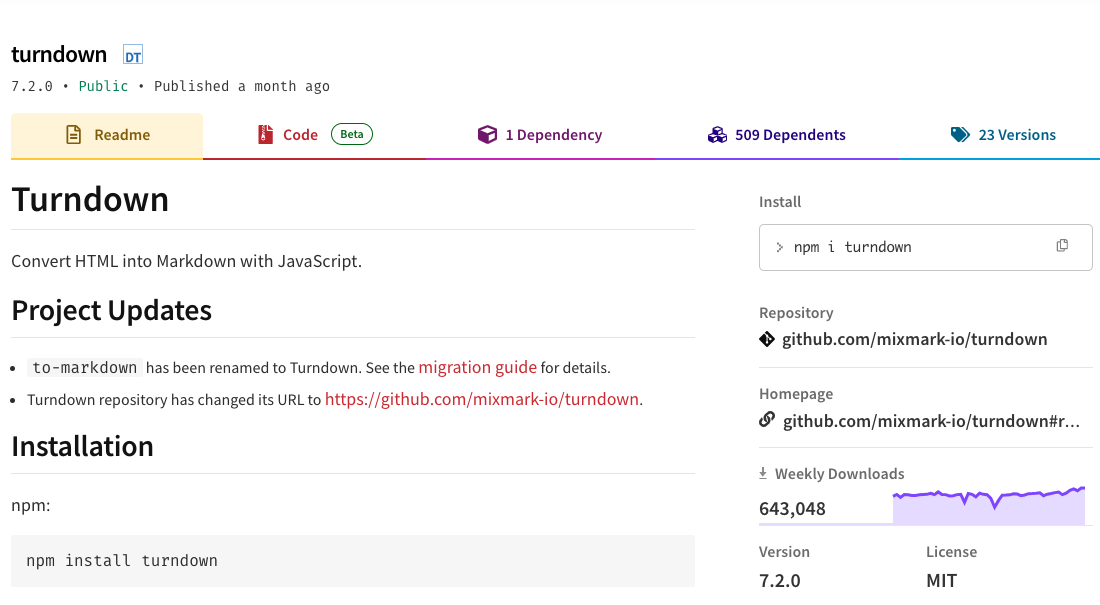
One important detail to note is that plugins involving the Block Editor are usually developed using React and then packaged using WebPack, which is typically provided by the local development environment. Even if BudCoder correctly generates the corresponding code, it cannot run directly due to the lack of a packaging environment.
Therefore, we need a better way to load NPM packages: using unpkg to load directly over the network.
Unpkg is a public CDN (Content Delivery Network) service for providing NPM package content. It allows developers to load any public NPM package directly from the NPM registry without installing and managing these packages locally. Unpkg provides a fast and convenient way to reference JavaScript libraries and other static resources, especially in front-end development.
Here are the optimized requirements from BudCoder:
The client requires a Block Editor Widget that enables users to paste HTML content and have it automatically converted to Markdown format. This Markdown content should then be displayed in a code format within the site.

Site UI:
- The widget should display the converted Markdown content in a code format.

Dashboard UI:
- The widget should be available in the Block Editor for users to paste HTML and see it converted to Markdown.

PS:
- The widget should handle the conversion from HTML to Markdown seamlessly.
We modify the PS section to guide BudCoder to use unpkg to load turndown.
PS:
- Use Pure JavaScript in Editor.js, e.g., use wp.element.createElement instead of JSX.
- Use element.useEffect to import turndown from unpkg.com by adding a script tag in Editor.js.
- Refer to the following function structure:

( function( blocks, element, editor, blockEditor ) {
    const el = element.createElement;
    const { useEffect, useRef } = element;
    ...

    blocks.registerBlockType( 'bcwp-rtf-widget/rtf-widget', {
        title: 'RTF Widget',
        icon: 'text',
        category: 'common',
        attributes: {
            content: {
                type: 'string',
                source: 'html',
                selector: 'div',
            },
        },
        ...

    } );
}(
    window.wp.blocks,
    window.wp.element,
    window.wp.editor,
    window.wp.blockEditor
) );